The MEX App makes getting started so much easier. With a smarter and faster way to get access to your data.
- Administrator sets up a user inside MEX.
- A four digit code is also set up for this user.
- Once the user is created a notification is sent via email or text to a user.
Generating an access code can be done from within the Control Files using the ‘Invite to App’ button.
You will find the Invite to App button within the control files, in the Security Users section.
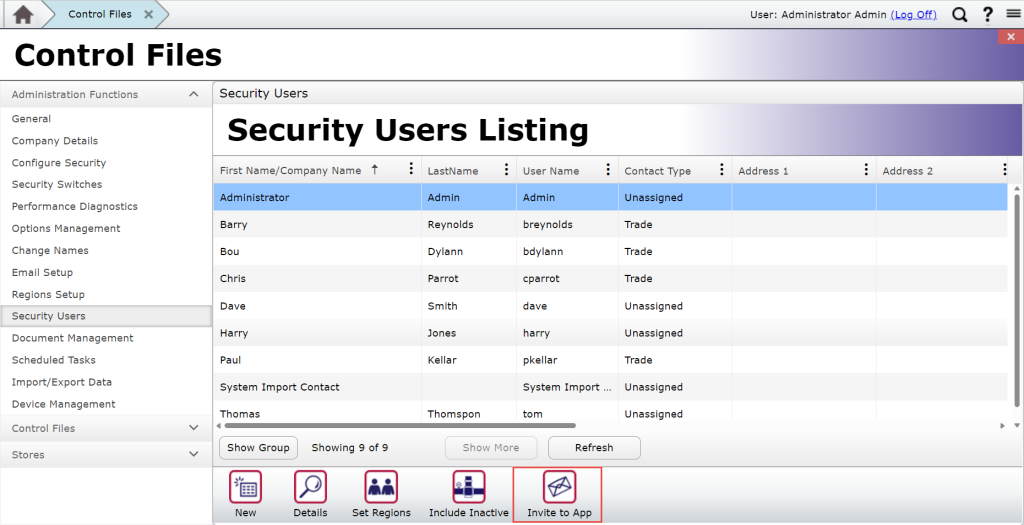
The invite to app button will open a menu allowing you to generate the code and send it to the user over SMS or email. Before generating and sending the access code some information is required.
- Server Address (Required) – This will automatically be fill in with your web address, the app will use this to connect to your site.
- User (Optional) – This is an optional field, if you select a user their username will automatically fill in on the app after entering the access code.
- Email – This is required only when you want to send the access code over email.
- Mobile – This is required only when you want to send the access code over SMS.
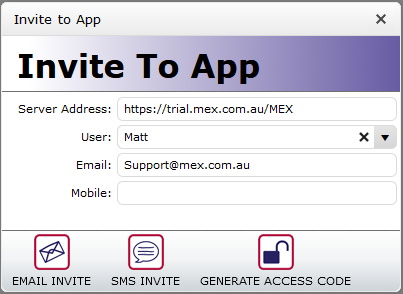
To send or display an access code you will be able to use the buttons at the bottom.
- Email Invite – To email the invite the above email address will need to be filled in to send the access code to
- SMS Invite – To send the invite over SMS the above Mobile Phone field will need to be filled in.
- Generate Access Code – This will generate an access code and display it on your screen.


- Once received, the user will then be asked to:
- Click Here to access MEX.
- This will Download the MEX App from the device’s respective app store.
- Once installed, the MEX App will be connected to the correct site.
- Next the user will be asked to enter the code sent to them.

- As this is the first time the user has logged in, you will be asked to enter a new password.

- Confirm the Password.
- Click the green tick to confirm
- Welcome to MEX!
